
La
verdad es que no suelo pintarme las uñas con diseños complicados, más bien me
las pinto de un solo color o incluso a veces me hago la manicura francesa, pero
desde hace tiempo tenía muchas ganas de probar este motivo en las uñas. Me
parece muy original, sobre todo para el verano, ya que en teoría queda mejor si
utilizas colores chillones, como verde, amarillo o rosa, que apetecen más en
esas fechas. Me gusta porque no es complicado y con un poco de paciencia puede
quedar muy bien! :)
I don’t
usually paint my nails with intricate designs, I prefer to paint them in one
colour or although occasionally, I go crazy, and do myself a French manicure. However, I really
wanted to try this design on my nails for quite a long time. It seems very original to
me, especially for the summer, as it tends to look better if you use
bright colours as green, yellow or pink, more suitable for these time of the year. I like
it because it’s not complicated to do and it can look great with a little patience!

NECESITAS:
YOU WILL NEED:
YOU WILL NEED:
1. Base: utiliza siempre una base
para proteger tus uñas, sobre todo si te las pintas a menudo y quieres evitar
que se pongan amarillentas. Yo utilizo una base endurecedora pero eso depende
de las uñas de cada una.
1. Base coat: always use a base coat to protect your nails, especially if you paint them frequently and want to keep them from turning yellow. I use a strengthening base coat, but that depends on which tipe of nails you have.
1. Base coat: always use a base coat to protect your nails, especially if you paint them frequently and want to keep them from turning yellow. I use a strengthening base coat, but that depends on which tipe of nails you have.
2. Pintauñas que combinen: he
utilizado tres tonos distintos de azul, aunque si quieres puedes utilizar más,
o incluso mezclar distintos colores como hemos dicho antes.
2. Matching nail polishes: I’ve used three shades of blue, although you can use more if you want to, or even mix different colours as we have said before.
2. Matching nail polishes: I’ve used three shades of blue, although you can use more if you want to, or even mix different colours as we have said before.
3. Rollitos de papel: corta un
trozo de papel y enróllalo con los dedos hasta que quede bien finito (si no
quitará el pintauñas en vez de arrastrarlo). Es mejor que hagas unos cuantos.
También puedes utilizar un alfiler o la aguja de un imperdible.
3. Little paper rolls: cut a piece of paper and roll it with your fingers until it's thin (if not it will remove the nail polish instead of dragging it). It’s better if you make a few. You can use a pin instead.
3. Little paper rolls: cut a piece of paper and roll it with your fingers until it's thin (if not it will remove the nail polish instead of dragging it). It’s better if you make a few. You can use a pin instead.
4. Pintauñas de acabado brillo: no
es imprescindible, pero da brillo y los colores se ven más bonitos. Además hace
que duren más tiempo!
4. Shine top coat: it’s not essential, but it gives brightness and colours look more vivid. It also makes them last longer!
4. Shine top coat: it’s not essential, but it gives brightness and colours look more vivid. It also makes them last longer!
5. Quitaesmalte: lo utilizarás al
principio para limpiar bien tus uñas y al final para quitar los restos de
pintura si te has salido.
5. Polish remover: you’ll use it at the beginning to clean out your nails and in the end to remove any trace of polish on your fingers.
5. Polish remover: you’ll use it at the beginning to clean out your nails and in the end to remove any trace of polish on your fingers.
6. Discos de algodón
6. Cotton pads
6. Cotton pads
PASO A PASO / STEP BY STEP
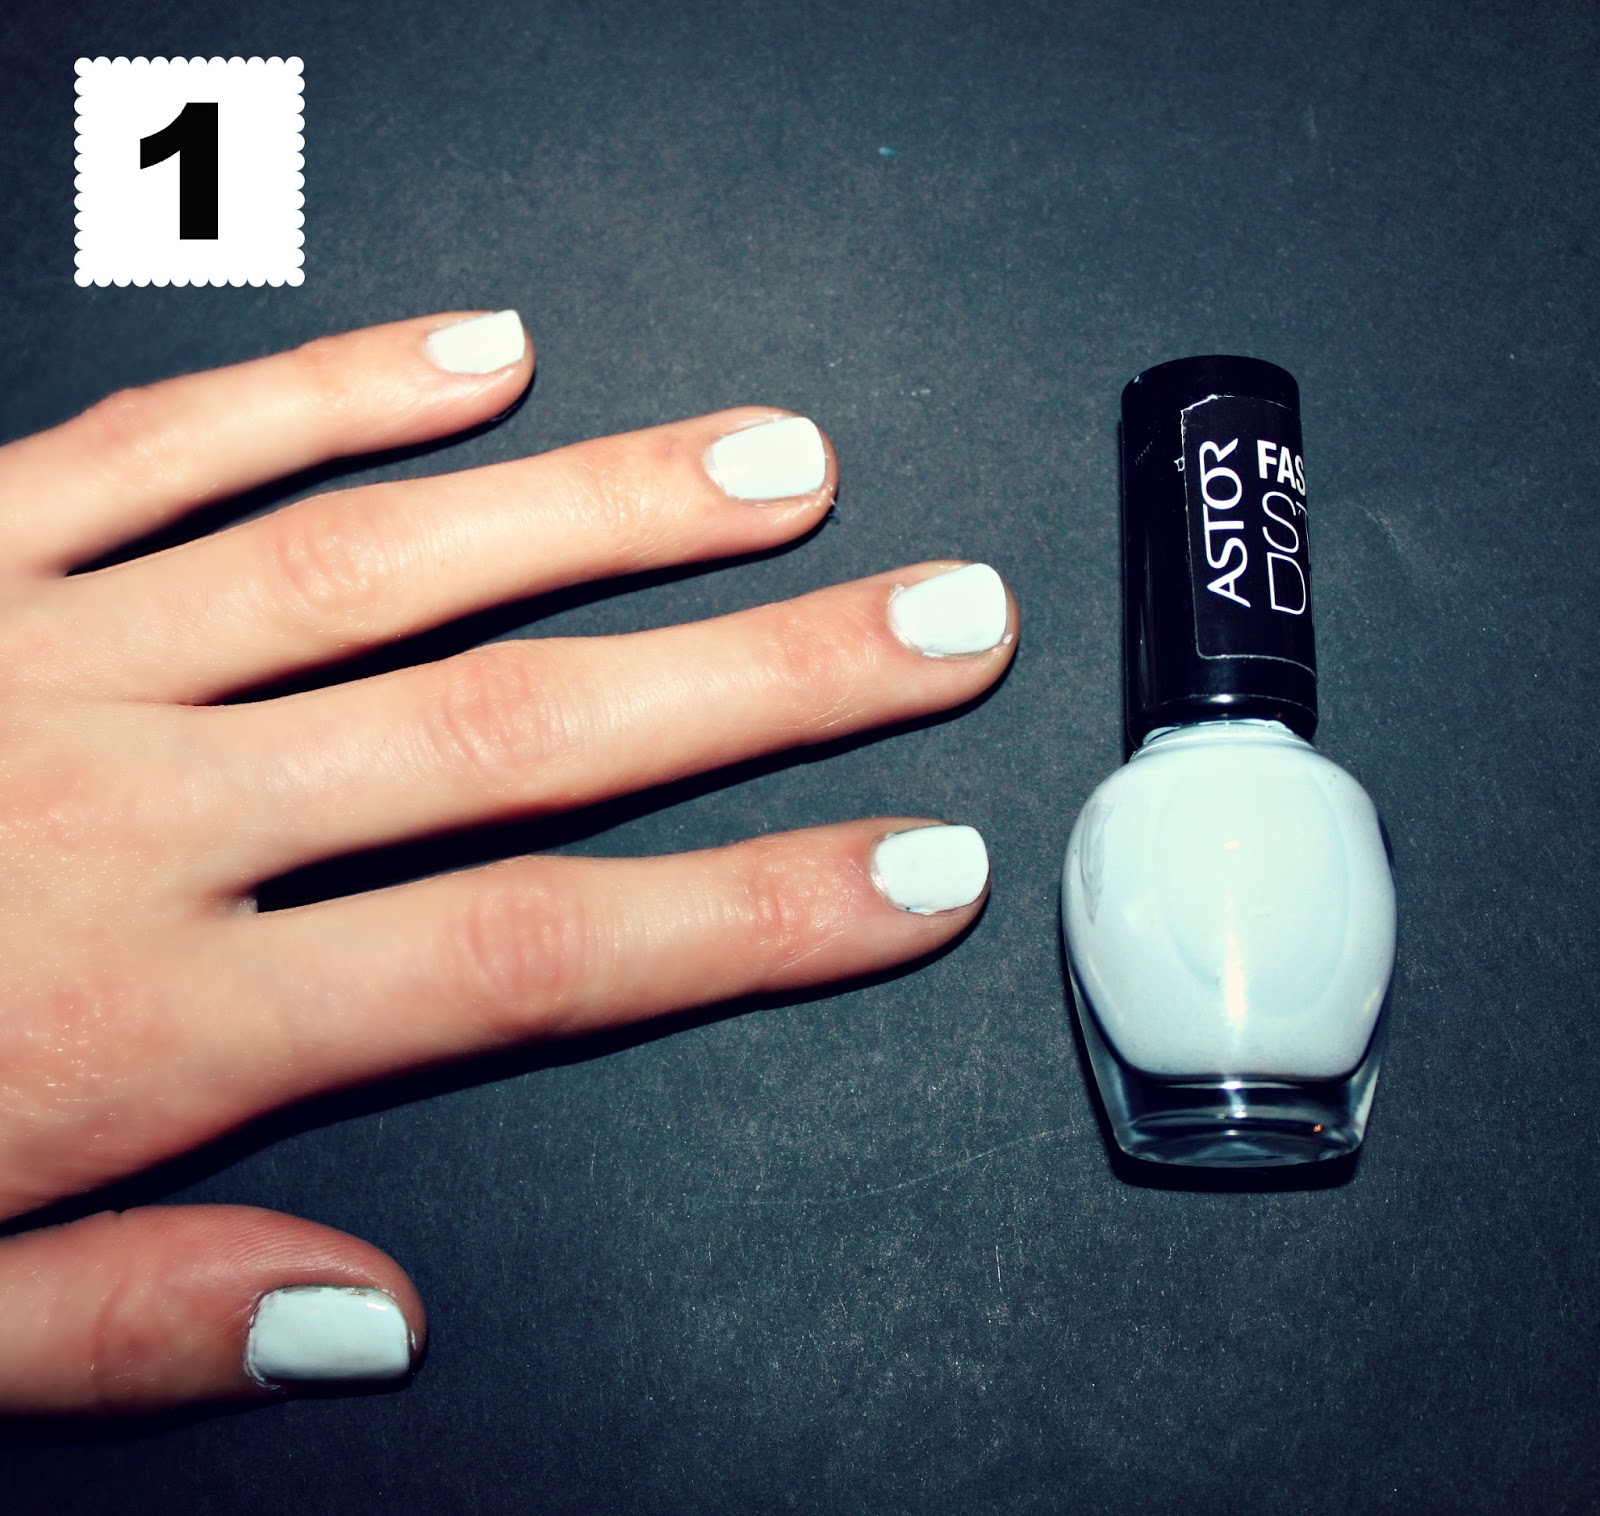
1. Elimina cualquier resto de esmalte antiguo, limpia bien tus uñas y lávate las manos (para quitar restos del algodón), aplica tu base y cuando se seque aplica dos capas del color más claro que hayas elegido, en este caso de azul celeste. Déjalo secar bien.
1. Remove any previous polish from your nails, clean them properly and wash your hands (to remove traces of cotton), apply your basecoat and when it’s dry add two coats of the lighter tone, in this case light blue. Let it dry completely.

2. Este paso tienes que hacerlo rápido. Aplica el siguiente tono en una esquina de tu uña, yo lo he hecho en la esquina inferior derecha pero puedes hacer el diseño como quieras. Aplica el último tono de azul a continuación del anterior, como si dibujaras un arcoíris. Tienes que poner bastante cantidad de ambos pintauñas para que puedas arrastrarlos bien a lo largo de la uña.
2. Step two must be done quickly. Apply
the next tone in our range of darker blues on one of the corners of your nail, I’ve done it in the bottom right corner but you can do it as you
like. Apply the last tone of blue right after the previous one, as if you were drawing
a rainbow. You have to put a fair amount of both tones of nail polish so that
you can drag them well along the nail.

 3. Sin dejarlos secar, coge un rollito de papel y arrástralo desde la esquina en la que aplicaste los pintauñas hacia la esquina opuesta como si dibujases rayos de sol. Si ves que no se ha arrastrado bien puedes repetirlo pero con mucho cuidado porque si se ha secado no quedará bien!
3. Without letting them dry, take a roll of paper and drag it from the corner where you applied the nail polishes to the opposite corner as if you were drawing sun rays. If you don't like how it looks you can try to repeat it. But be aware, if the polish has dried out it won’t look good!
4. Por último déjalo secar todo completamente, y cuando hayas comprobado que se ha secado (al poner una uña contra otra no se pegan) aplica una capa de pintauñas de acabado brillo. Quita los restos de pintura de tus dedos con quitaesmalte y un algodoncito con mucho cuidado y listo! Ya tienes tus uñas TIE-DYE! :)
4. Finally, let everything dry
completely, and when you have checked it’s dry (by putting a nail against
another and they don’t stick together) apply a coat of shine top coat. Remove carefully
any trace of polish from your fingers with the polish remover and a cotton pad
and go! You already have your TIE-DYE nails! :)
¿Te atreves?Do you dare?
Espero que os gusten, aquí os dejo algunas ideas e inspiraciones:
Hope you
like them! Here you have some ideas and inspiration:

No hay comentarios
Publicar un comentario